


Hello everyone. This is the second part of the two
part series, which intends to lay a foundation on what Exploit
Development is and why learning it is extremely valuable for a Security
Enthusiast.
I myself am just starting on this journey and I'll
try to explain the concepts to my best. As my knowledge on the subject
grows, I'll upload new blogs on the topic and add changes in this blog
if necessary.
Picking up from Part 1
Part
1 was a bare minimum introduction to exploit development. We saw what
it actually meant, how it is performed and who and why anyone should
learn it.
After that, there was a setup guide to demonstrate an actual exploit development scenario. This part aims to complete it.
What is Spiking?
In layman's terms, spiking is like fuzzing. It sends a huge amount of data to a computer system. The part where it is different from fuzzing is the fact that spiking send only garbage values with the aim of bringing down the security features of the system or the system all together while fuzzing intends to get some useful information out of the data it sends.In this situation, we have a server running and we don't know what command accepted by the server is vulnerable to buffer overflow attack. So we need to spike it to find out.
We need two components to perform spiking. One is the spike script; which basically tells what the program must do. Next is the interpreter to send the spike script. We will use "generic_send_tcp" as the interpreter as Vulnserver is TCP based.
First we will test the "STATS" command.
Spike script:
The spike script is the script which tells the interpreter what to send and execute.
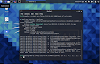
This is the format of a spike script:
Spiking the STATS command:
For testing the STATS command, put "STATS " as the argument in the "s_string("");" line.
Now
since it's all set, we can perform the actual spiking. Use the command
"generic_send_tcp <ip address of windows machine> 9999 <name of
the spk file> 0 0 " to start spiking.

Even
after running it for a while, the server didn't crash; which means that
the STATS command is not vulnerable to buffer overflow.
What do
we do now? Well, just do the whole thing again, but with different
command. This time we will use the "TRUN" command. I'm choosing the TRUN
command for two reasons. One is that it has the same number or
arguments required, which means I don't have to change my spike script.
And two is that I already know that TRUN is vulnerable. But in the real
world, this will not be the case.
Spiking the TRUN command:
Do all the same steps which we did for the STATS command, but in the spike script, put "TRUN " instead of "STATS " as the argument in the "s_string("");" line.Now run the generic_send_tcp script again.

Well, we did it! The Vulnserver has crashed and Immunity Debugger has paused. If you look at the registers, we have gone over ESP over to the EIP, which we want to control. This means that the unprotected EIP can now be accessed to perform code execution by us.
Note: After each time Vulnserver crashes, restart it.
But we don't exactly
know when the ESP is being overflowed and to find that, we need to know
at what byte exactly the server breaks down. So we will Fuzz it.
Fuzzing the TRUN command:
We are aiming to find where exactly the breakdown occurs. To be specific, at which byte.

As
you can see, this script aims to repeatedly send the command "TRUN"
plus a bunch of the character "A" as the argument to the server until it
breaks down. Then, it gives us the byte size.
Now execute the python script.

Voila! The server breaks down at 2700 bytes. With this information we can proceed to find the starting point of the EIP.
Finding the offset:
To find the offset point, we will be using a tool called pattern_create by the Metasploit framework.
What this does is that it creates a repeated/cycle of characters and this will help us where the EIP starts.

Now
go to the old fuzzing script and replace the value of the "buffer"
variable with this string and remove the while loop. Now run the script
again.

If you look at the EIP register, there is a value there.
Take a note of the value and enter this command which uses the
pattern_offset tool to find where the value is present in the previous
string which we used in the fuzzing script. :
We get that there is a match at 2003 bytes. This means that anything 2003 bytes, goes into the EIP.
Ok, we got where the EIP starts, but what after that?
Well
since the EIP is not protected against any command executions, you can
do whatever you want basically. Generating a reverse shell, privilege
escalation and many other things are within your hand's reach now. This
is an exploit and this is a basic demonstration of how you can develop
one.
Just make sure you don't break everything.
Conclusion:
We
saw how we can find a vulnerability in something and develop an exploit
out of it. Submit it to a website like exploit.db and if it is
accepted, then you have a CVE with your name as the finder/developer.
Learning
exploit development might seem a daunting task at first. But as all
other things, it becomes more easy and interesting as you learn more and
more about it.


0 Comments